A trigger is a special type of stored procedure or action that allows you to setup automatic reaction runs in response to conditions or events.
Adding a new trigger
You can create a new trigger easily by following the steps below:
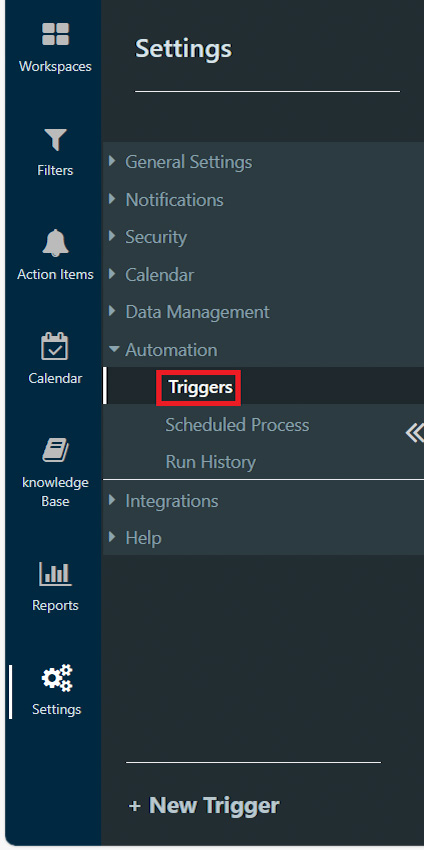
- Select Automation from Settings
- Select Triggers
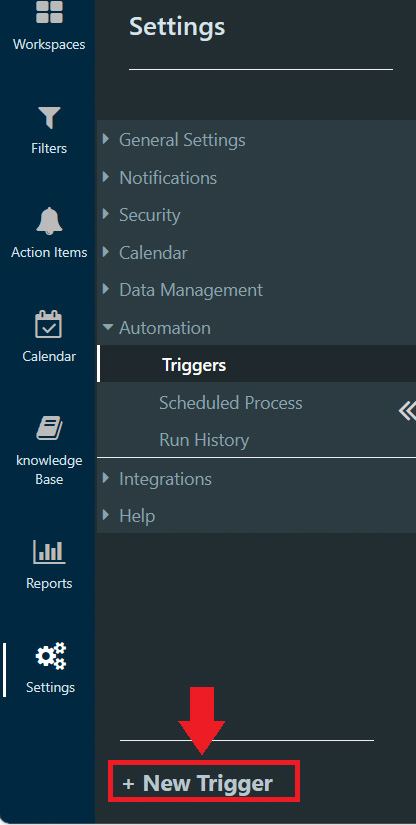
- Click on + New Trigger
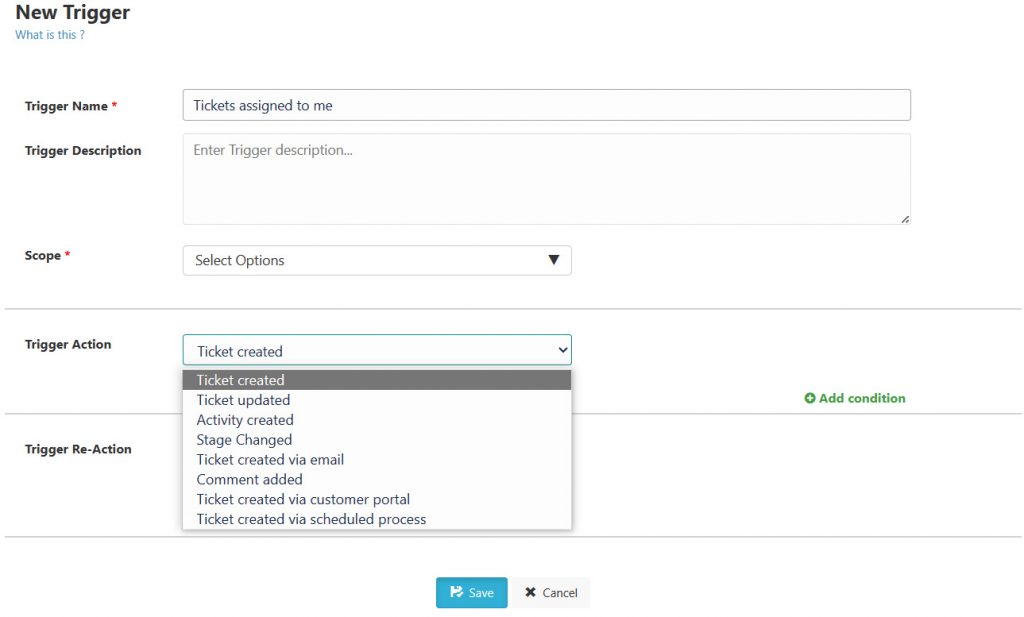
- Fill in Trigger Information
- Trigger Name: For example – Tickets assigned to me
- Trigger Description: Enter a description for the trigger
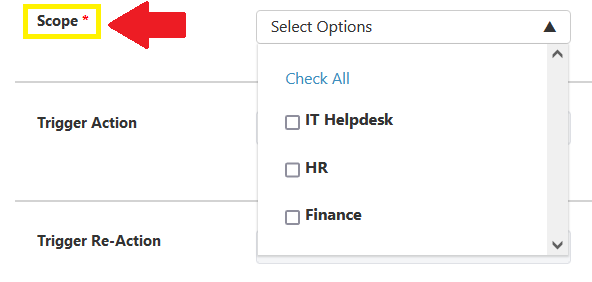
- Scope: The workspace the trigger will be activated in
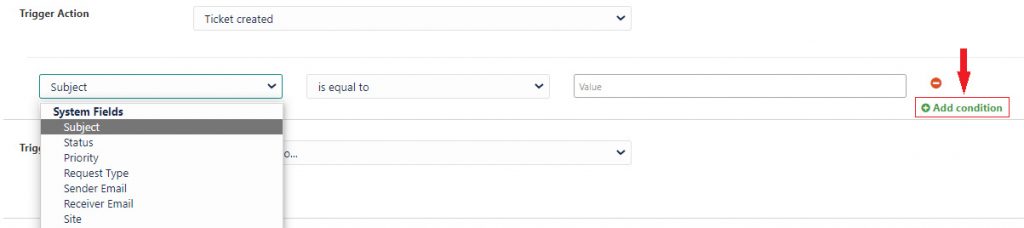
- Trigger Action: Select an action from the drop down list to use them as the action triggers (Ticket created, ticket updated, activity created, stage changed, ticket created via email, customer portal, and scheduled process, comment added)
** Under the Ticket updated option, the below are the values that are considered updates for the ticket:
1- Ticket subject
2- Ticket status
3- Ticket owner
4- Ticket assignee
5- Priority level
6- Ticket description
The Ticket updated triggered action will work on existing tickets, and will be activated when one of the above values is updated.
- You can specify one or more conditions to trigger the action
- Trigger Re-Action: Select a reaction in response to the trigger action.
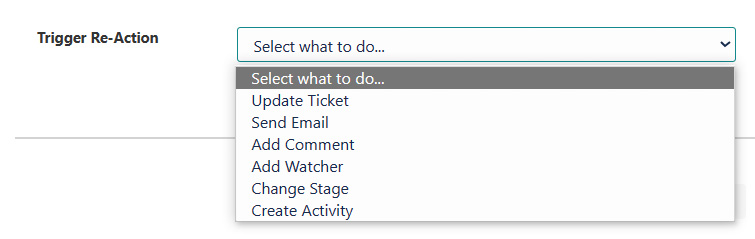
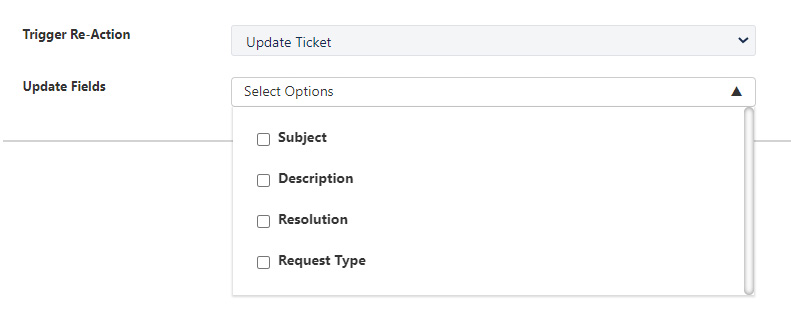
- Update ticket: Select a field in the ticket to update.
- Send email : Select an email template to send
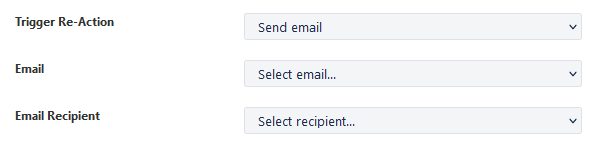
To create new templates: Go to Settings > Notifications > Custom Notifications
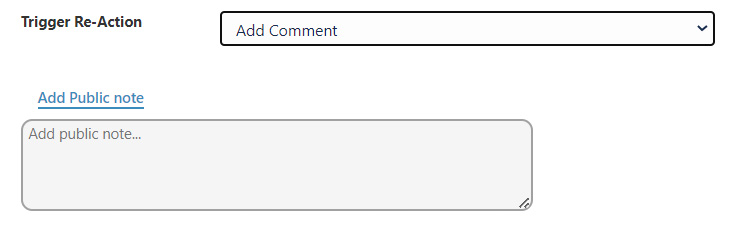
- Add Comment: Add a comment to be added to the ticket
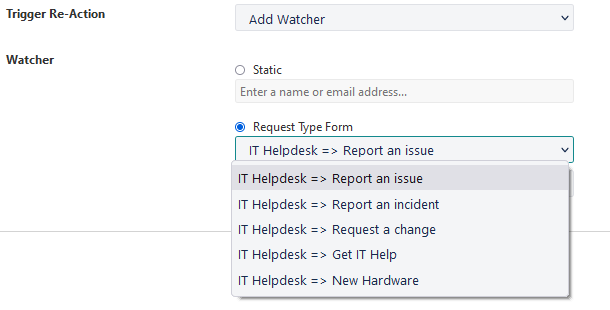
- Add Watcher: Add a watcher to the ticket, either choose a static watcher or choose the default watcher per Request Type
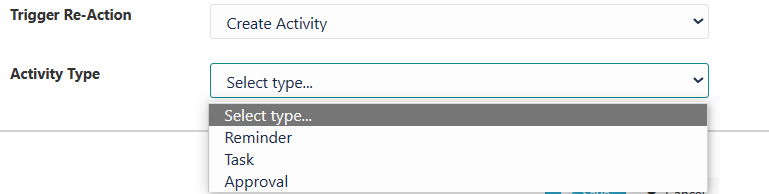
Create activity: Add activities, Reminders, Tasks, and Approvals.
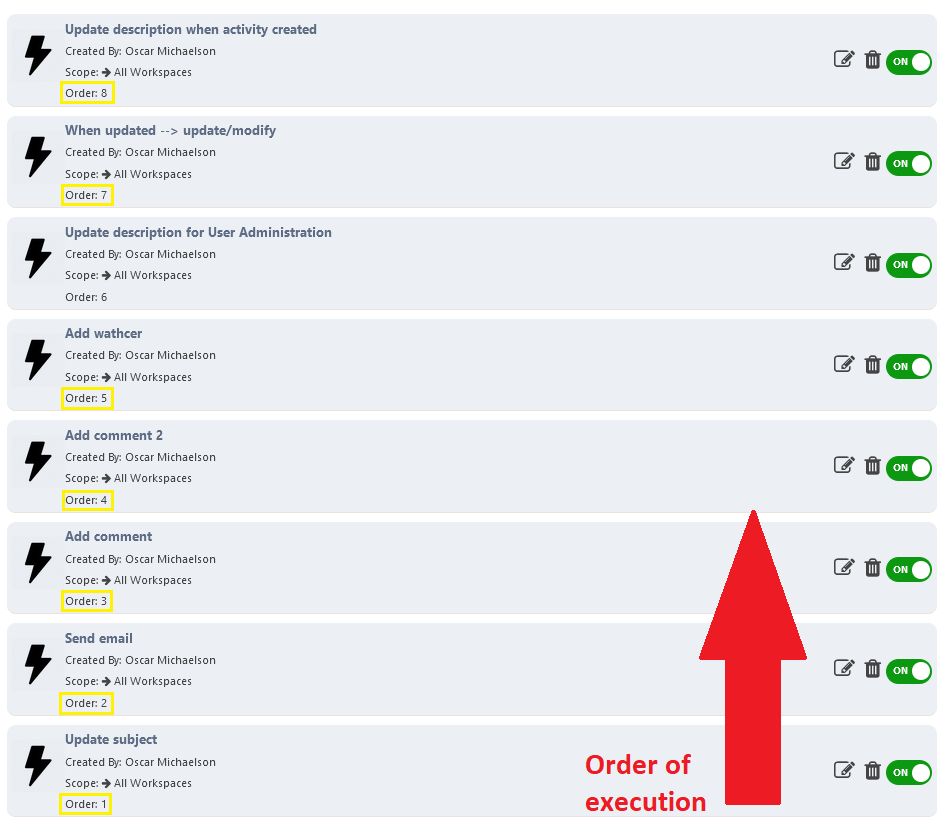
Triggers Execution
Triggers are activated from the older to the newest, depending on their orders. (Trigger order is mentioned on each trigger)