If you have multiple shifts for your employees and need several working calendars each with its own separate business hours, you can use this guide to further understand how you can do it.
The Calendar module serves 2 main functions:
1- It can be used as a normal calendar to check the dates.
2- It is used as a control tool to prevent sending reminders and escalations outside the working hours.
Creating a Calendar
1. Start off by going to the Settings > Calendar
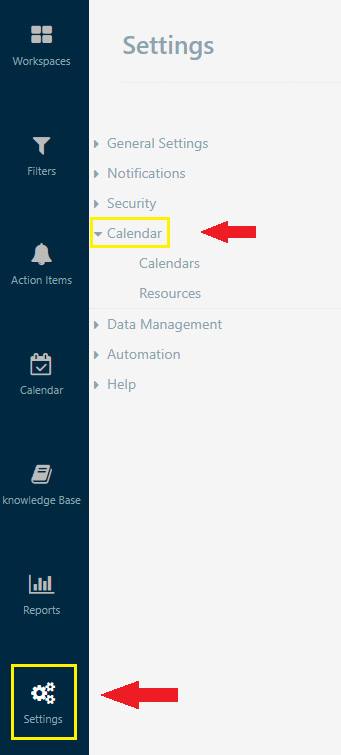
2. You will find the default working calendar, which can be edited by clicking on the little pen and paper button to the left of the word default.
To create new calendars, click on new item.
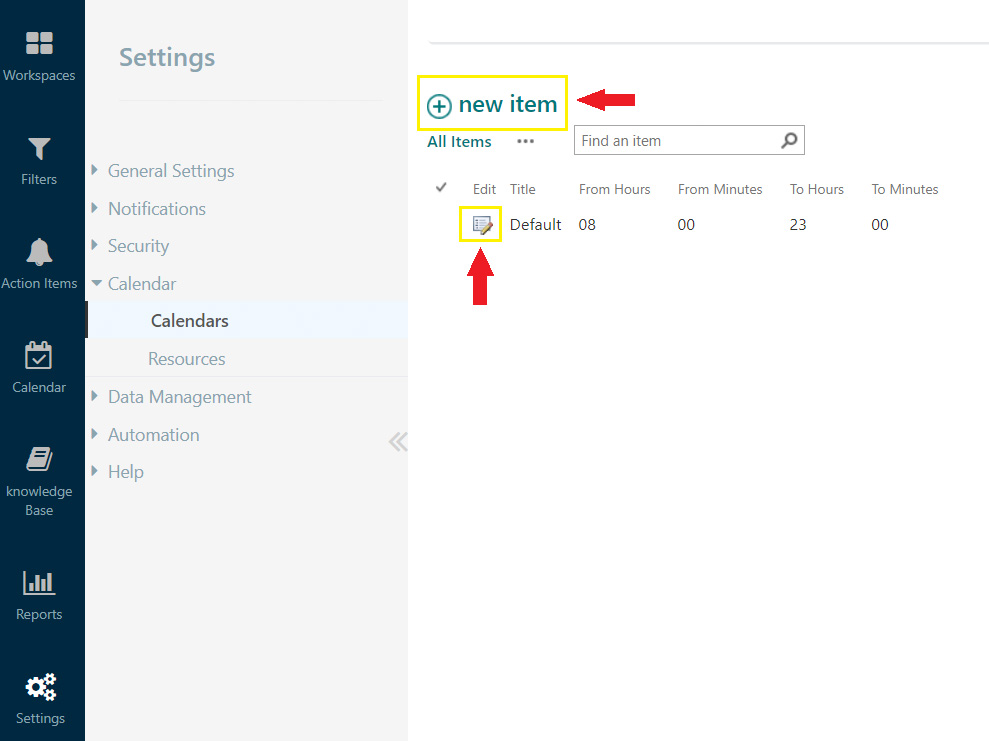
3. The calendar creation screen should show up. When you are finished creating your calendar, click on save.

- Title: Name of the calendar.
- From Hours: The start of the work shift for this calendar (in hours). Note: Helpdesk Calendars use the 24-hour clock as its format.
- From Minutes: The start of the work shift for this calendar (in minutes).
- To Hours: The end of the work shift for this calendar (in hours). Note: Helpdesk Calendars use the 24-hour clock as its format.
- To Minutes: The end of the work shift for this calendar (in minutes).
- Checkboxes: The days checked will be used as the week days/working days for this calendar.
Assigning a Calendar to a user
1. To attach the newly created calendar to an assignee, you need to go back to the Settings > Calendar > Resources
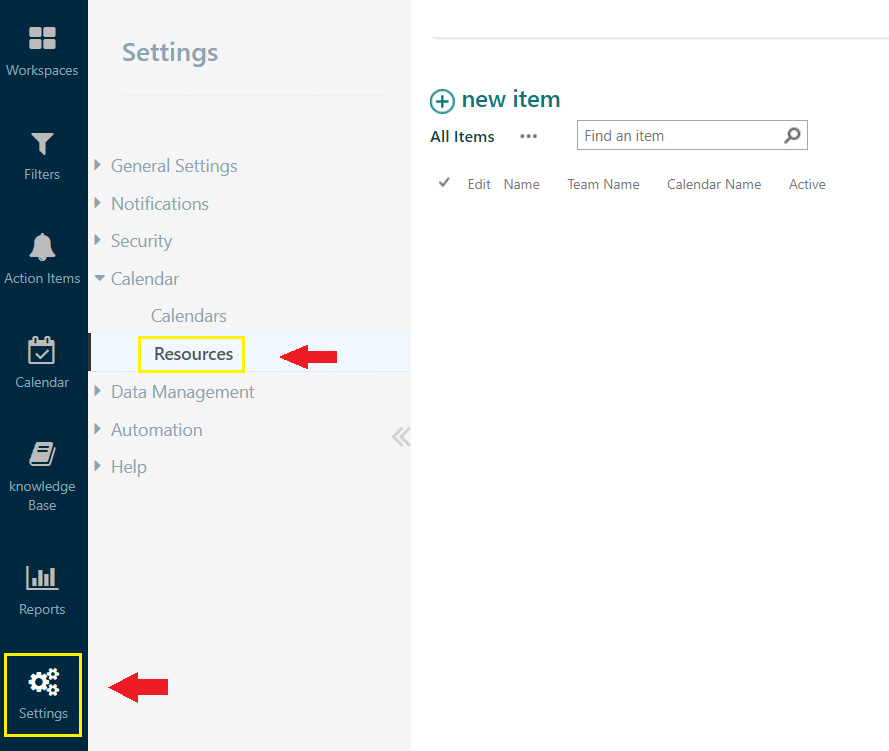
2. By default, there are no items in this menu since all the users on Helpdesk operate under the default working calendar. Click on new item.

3. The resource creation menu should look like the following picture. When you are finished, click on save.

- Name: A lookup for the employee you want to assign the calendar for.
- Team Name: A lookup for the team that employee falls under.
- Calendar name: Select the calendar you want to assign to this employee.
- Active: Toggle the checkbox to activate or deactivate the resource.