The ticket form includes; by default; a number of fields such as: Workspace, Request Type, Subject, Assignee, and more. Notwithstanding, users can customize their forms for each request type/ category/ subcategory by adding ticket user-defined fields. They can deploy any number of custom fields and add different types of data.
Luckily, in this new release and to enhance the overall user experience, these custom fields can now be connected to SharePoint columns. This allows people to:
- Track additional ticket information in an organized way through the use of views.
- Get insights into their data when exported to Excel for in-depth analysis.
- Communicate data with different stakeholders through the use of custom fields as placeholders in their notifications.
- Build a logic structure that the Helpdesk uses to determine whether to execute a pre-defined reaction (i.e., Trigger module).
In the upcoming sections, we will discuss in details how to add custom fields and connect them to SharePoint columns, and the intended benefits of using them.
Configuring Ticket Custom Fields
To add custom fields to your forms and connect them to SharePoint columns, do the following:
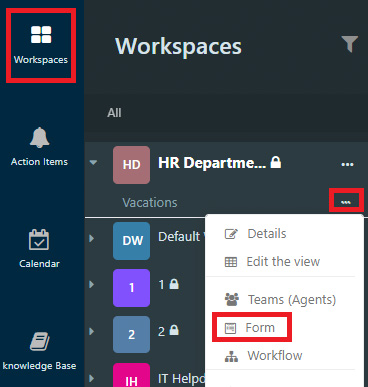
- Select Form from the drop-down menu of the Request Type/ Category/ Subcategory.
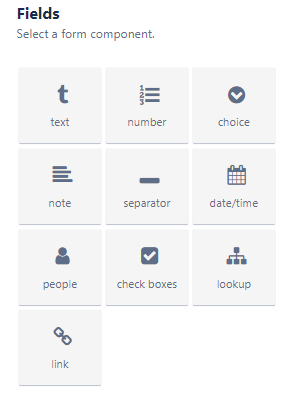
- Add custom fields from the form components.
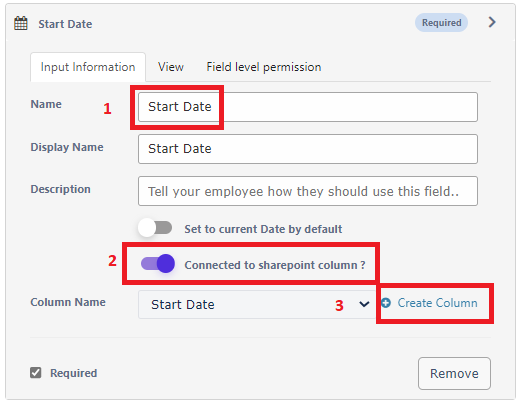
- Give the custom field a name.
- Turn on the Connected to SharePoint column option.
- Hit the Create Column button.
Repeat these steps for any additional custom fields you may need.
Why Do I Connect Custom Fields to SharePoint Columns?
In the following sections, we discuss the added value of connecting custom fields to SharePoint columns.
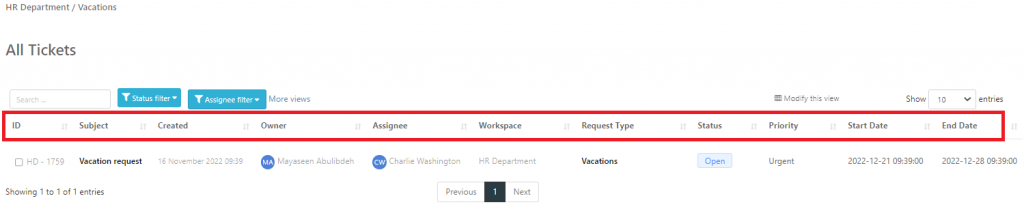
1. Tracking Additional Ticket Information in an Organized Way
System admins are able to customize their interfaces by hiding or displaying some of the columns that are available within the view. They can select default as well as custom fields to be displayed.

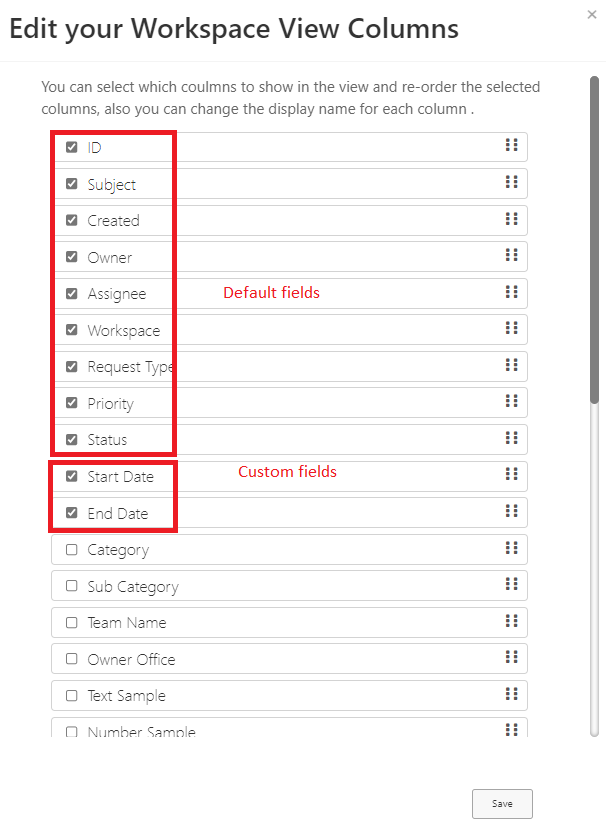
Once you are done with your changes, click on Save and here we are!
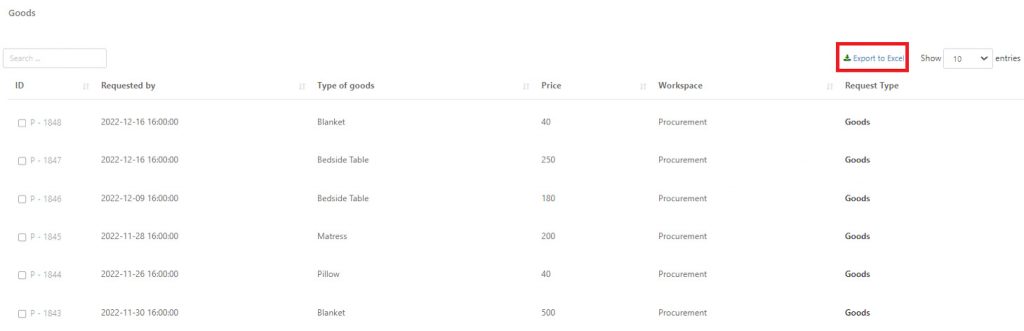
2. Getting Insights into Data
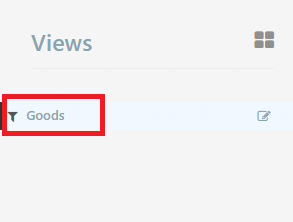
Once views (i.e., filters) are created, users have the option to export them to Excel and create custom pivot tables to uncover insights and comparisons with their data.

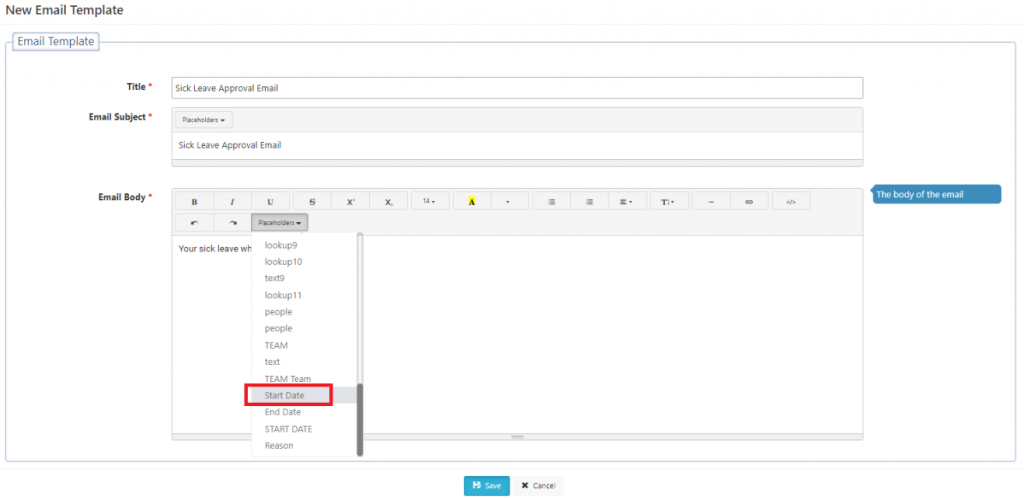
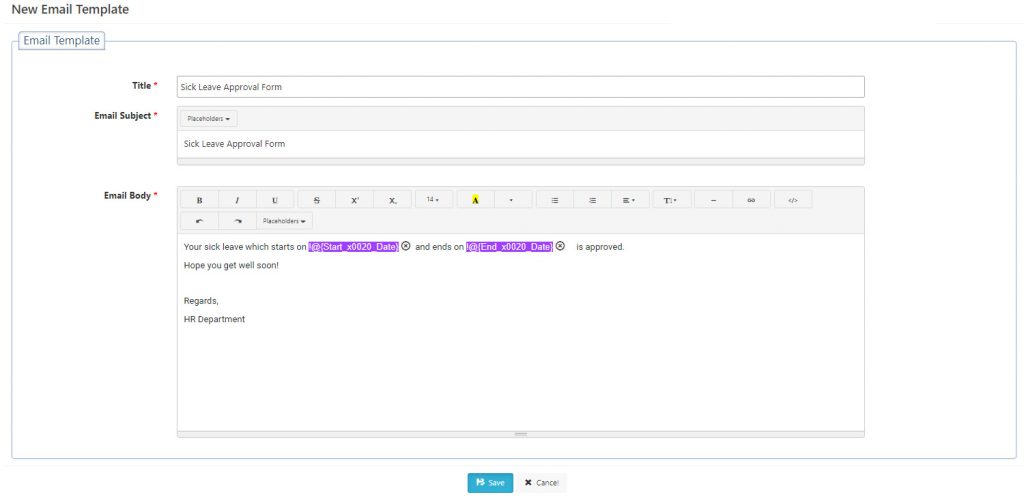
3. Communicating Data with Stakeholders via Notifications
Users can make use of the newly added custom fields in the Custom Notifications module and add them as placeholders.
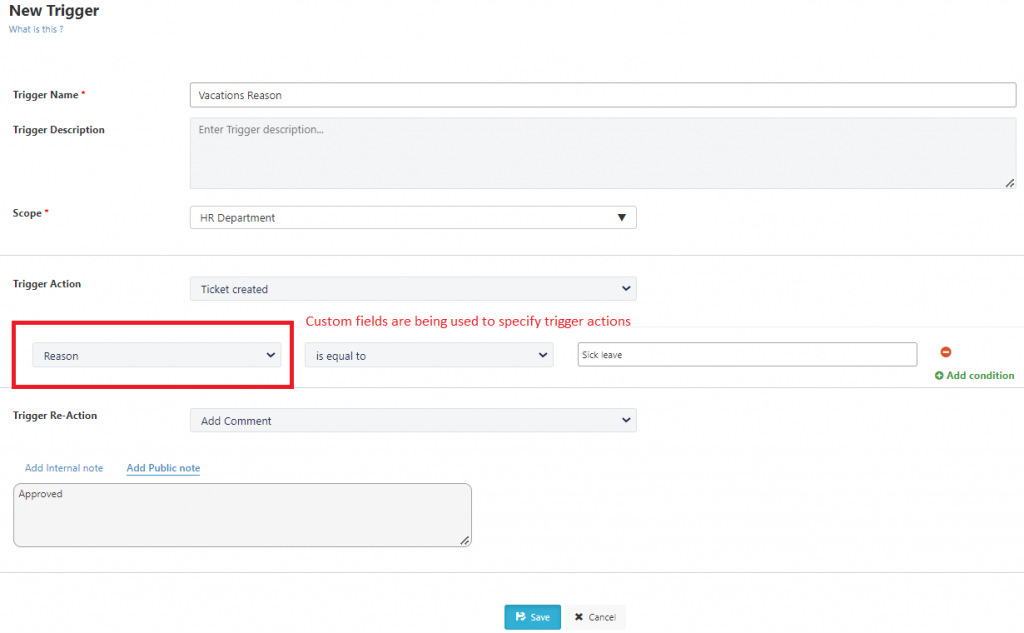
4. Building a Logic Structure via Triggers
Users can also make use of the newly added custom fields in the Trigger module.