A Step-by-Step Guide to Connecting Power BI with Your Office 365 Helpdesk Add-In
As we’ve incorporated an Office 365 add-in, Helpdesk seamlessly integrates with various Microsoft products, including Power BI for reporting purposes. This tutorial provides a step-by-step guide on establishing the connection between Power BI and the Office add-in.
- Open Power BI Desktop and in the Home tab of the ribbon, select Get data > More.
- Select Online Services, and then select SharePoint Online List.
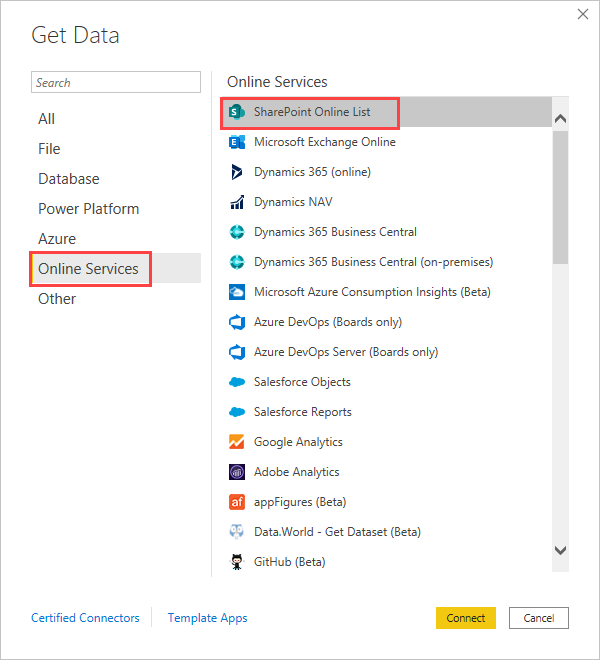
- Click on Connect.
- Find the address (also known as a URL) of your SharePoint Online site that contains your list. You can find it where your helpdesk is installed. Please note that you need to copy this URL including the APP ID which appears in the browser.

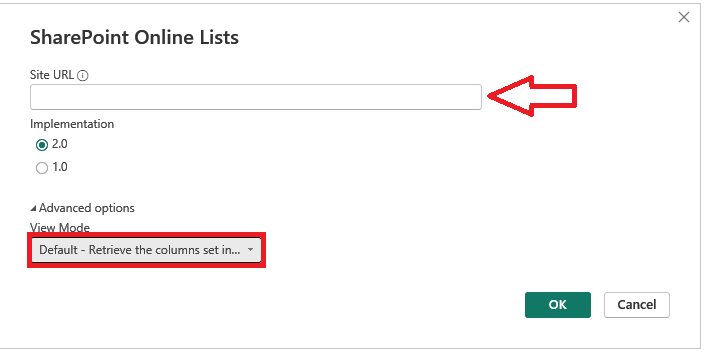
- In Power BI Desktop, paste the address into the Site URL field of the SharePoint Online Lists dialog box, select implementation 2.0 and in advanced mode make sure to select default view mode, then click on OK.
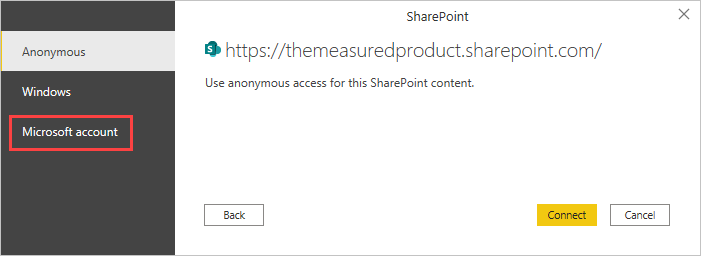
- You might or might not see a SharePoint access screen like the following image. If you don’t see it, skip to step 9. If you do see it, select Microsoft Account on the left side of the page.
- Select Sign In and enter the username and password you use to sign into Microsoft 365.
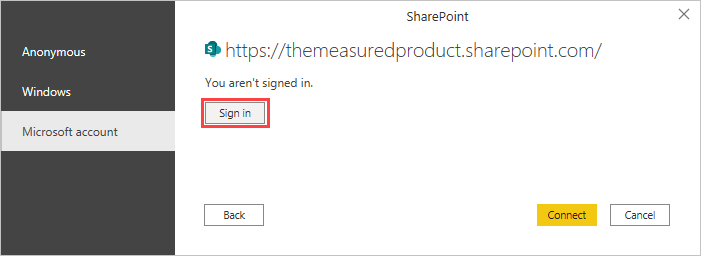
- When you finish signing in, click on Connect.
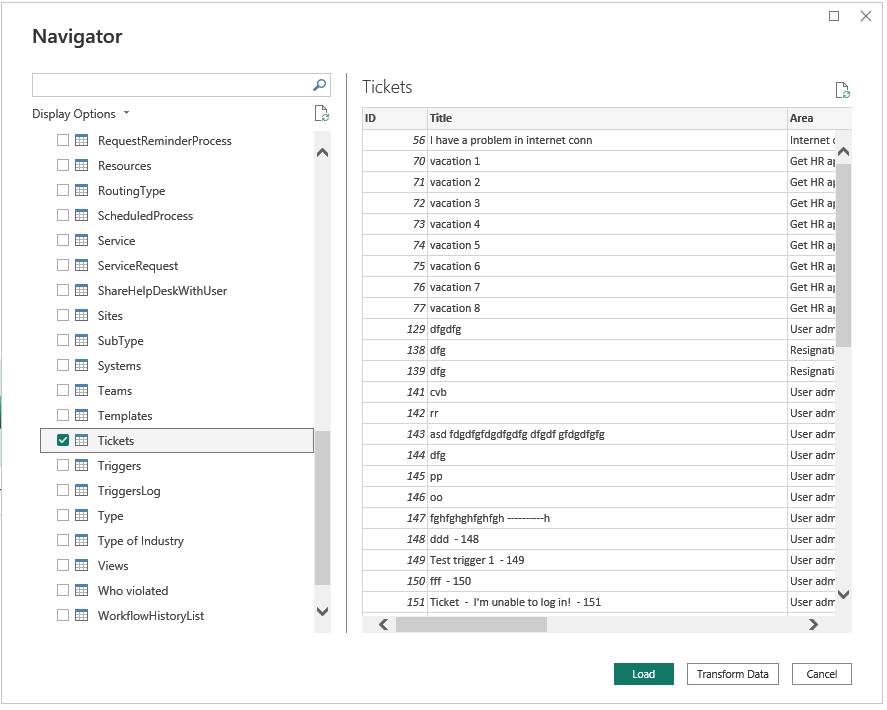
- On the left side of the Navigator dialog box, select the checkbox beside the SharePoint list you want to connect to.
For additional assistance with the connection process, feel free to reach out to us at: support@steadypoint.net