Requesting a New Account
Suppose your company is onboarding a new employee that needs to have their company accounts (e.g., email) or a new laptop set up. To prepare for the recruitment of your companies’ new arrivals, Request a New Account. Below are steps on how this could be done:
The Workflow of how the system works is shown below.
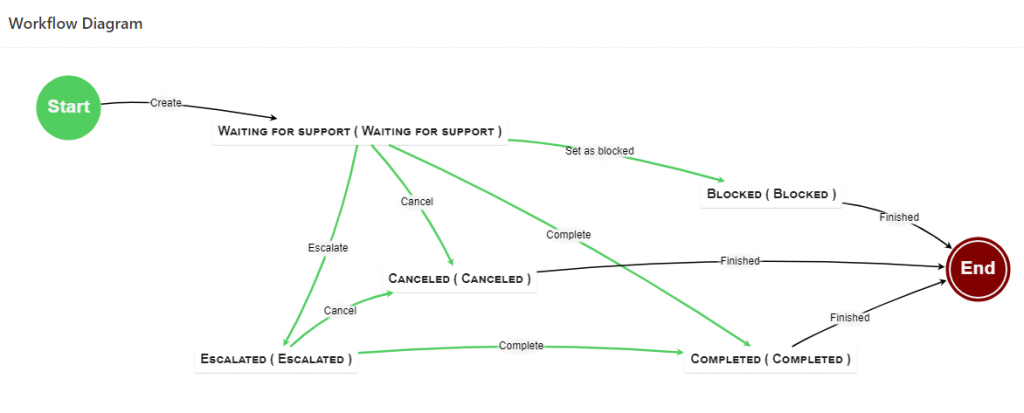
1) Add 5 Stages
- Waiting for Support
- Cancelled
- Blocked
- Escalated
- Completed

2) Edit “Waiting for Support” Stage
Add Stage Information:
- Status: Waiting for Support
- Stage Name: Waiting for Support
- Assignee (User or Group): Select a person or group that is best suited to make this decision.
- Category: Transition Stage

Add Outcomes;
- Outcome Name
- Go to Stage: Select the Stage this action will go to

Outcome 1
- Outcome Name: Cancel
- Go to Stage: Cancelled

Outcome 2
- Outcome Name: Block
- Go to Stage: Blocked

Outcome 3
- Outcome Name: Escalate
- Go to Stage: Escalated

Outcome 4
- Outcome Name: Complete
- Go to Stage: Completed

3) Edit “Canceled” Stage
Add Stage Information;
- Status: Canceled
- Stage Name: Canceled
- Assignee (User or Group): Select a person or group that is best suited to make this decision.
- Category: Transition Stage
For example:
- Outcome / Status 1: “Canceled”

4) Edit “Blocked” Stage
Add Stage Information;
- Status: Blocked
- Stage Name: Blocked
- Assignee (User or Group): Select a person or group that is best suited to make this decision.
- Category: Transition Stage
For example:
- Outcome / Status 1: “Blocked”

5) Edit “Escalated” Stage
Add Stage Information;
- Status: Escalated
- Stage Name: Escalated
- Assignee (User or Group): Select a person or group that is best suited to make this decision.
- Category: Transition Stage
For example:
- Outcome / Status 1: “Escalated”
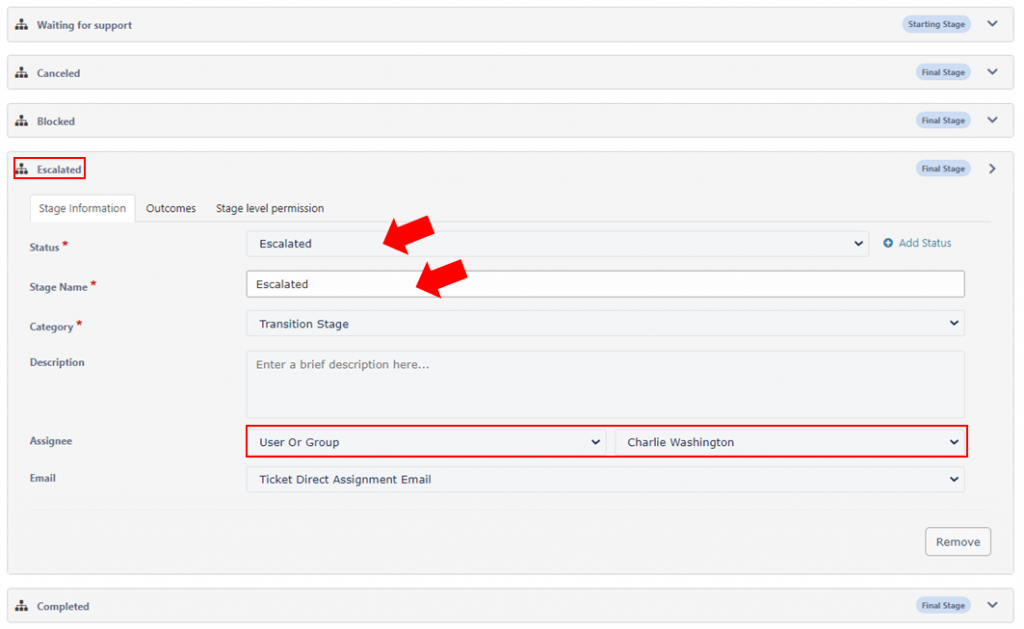
Add Outcomes;
We are adding Outcomes to the “Escalate” Stage because we are passing along the decision making to another user
- Outcome Name
- Go to Stage: Select the Stage this action will go to

Outcome 1
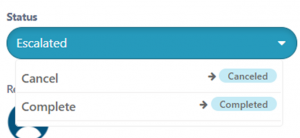
- Outcome Name: Cancel
- Go to Stage: Cancelled

Outcome 2
- Outcome Name: Complete
- Go to Stage: Completed

6) Edit “Completed” Stage
Add Stage Information;
- Status: Completed
- Stage Name: Completed
- Assignee (User or Group): Select a person or group that is best suited to make this decision.
- Category: Transition Stage
For example:
- Outcome / Status 1: “Completed”
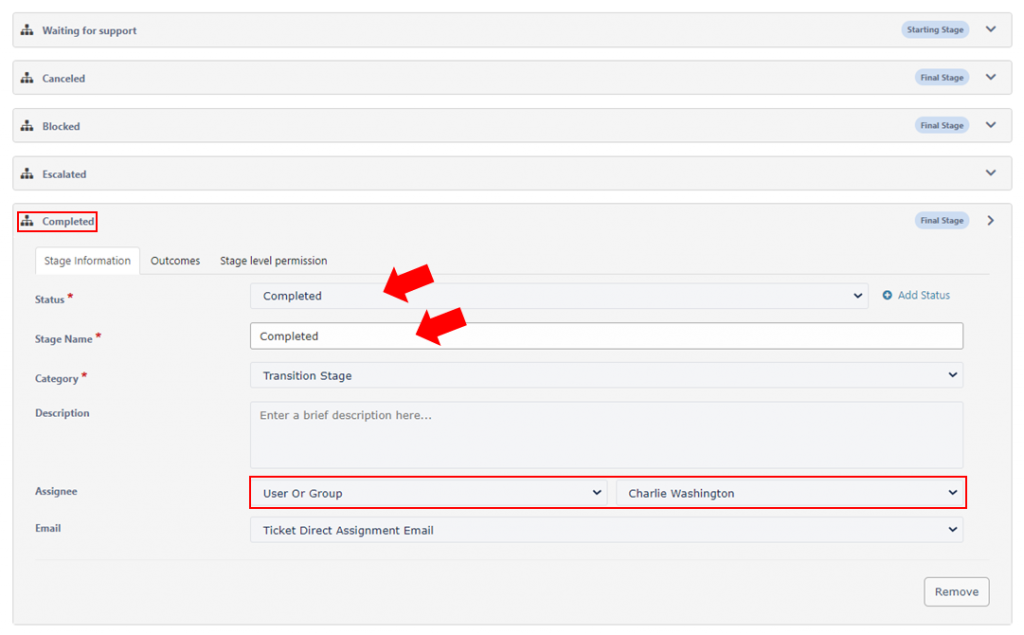
Once the stages are completed,
7) Publish and try it out!
After receiving a ticket, this is what it should look like
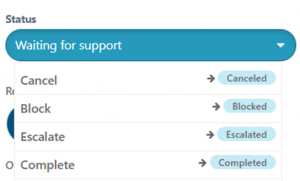
If the User decides to Escalate this request, the options below will appear
The screenshot below demonstrates an example of the end result, after the ticket has been closed

